E-mail Node

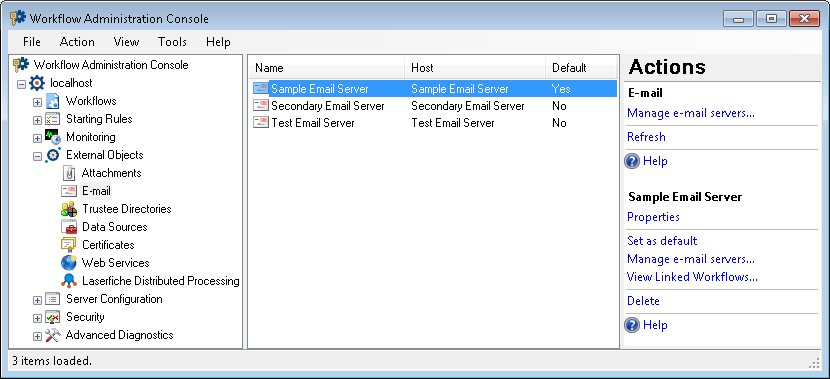
This node, under External Objects in the Workflow Administration Console, lets you view the e-mails servers that are configured to work with workflows on the Workflow Server. You can add, modify, and delete e-mail servers from this node.

ClosedShow me this node.

To open this node

  1. In the Workflow Administration Console's Console Pane, expand the External Objects node.
  2. Select E-mail. The node will list of all the e-mail servers that are configured to work with workflows on the Workflow Server.
  3. Tip: You can refresh this list to reflect recent changes by clicking the Refresh link below E-mail in the Actions Pane. Alternatively, right-click the E-mail node and select Refresh.

To add an e-mail server

  1. In the Console Pane, select the E-mail node.
  2. Click Manage e-mail servers from the Actions Pane. Alternatively, right-click the node or an existing e-mail server and select Manage e-mail servers.
  3. In the E-mail Server Manager dialog box, click Add.
  4. Configure the E-mail Server Properties.

To modify an e-mail server

  1. In the center Details Pane, select an e-mail server.
  2. Click Properties under the e-mail server's name in the Actions Pane, or right-click the e-mail server and select Properties.
  3. Configure the E-mail Server Properties.
  4. Note: You can also modify an e-mail server by clicking Edit in the E-mail Server Manager dialog box. See the To add an e-mail server section above for instructions on how to access this dialog box.

To set an e-mail server as the default e-mail server

  1. In the center Details Pane, select an e-mail server.
  2. Click Set as default under the e-mail server's name in the Actions Pane, or right-click the e-mail server and select Set as default.
  3. Note: You can also make an e-mail server the default e-mail server in the E-mail Server Manager dialog box. In this dialog box, double-click the Is Default column next to the e-mail server so that a green check mark appears. The To add an e-mail server section above describes how to access the E-mail Server Manager.

To view the workflows that use a specific e-mail server

  1. In the center Details Pane, select an e-mail server.
  2. Click View Linked Workflows under the e-mail server's name in the Actions Pane, or right-click the e-mail server and select View Linked Workflows.
  3. The Linked Workflows dialog box will show the name, description, and version of the workflows that use the e-mail server.

To delete e-mail servers

  1. In the center Details Pane, select one or more e-mail servers. Hold down CTRL to select more than one e-mail server at once.
  2. Click Delete under the selected item's name in the Actions Pane, or right-click the e-mail server and select Delete.
  3. Note: You can also delete one or more e-mail servers by clicking Delete in the E-mail Server Manager dialog box. See the To add an e-mail server section above for instructions on how to access this dialog box.

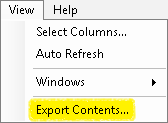
To export the contents of this node in a .csv, .xml, or .txt file

  1. Select the node in the Console Pane.
  2. Select View from the main menu.
  3. Click ClosedExport Contents.
  4. In the Export data dialog box, name the exported file.
  5. Select CSV File, XML File, or Tab Delimited Text File from the drop-down menu.
  6. Click Save.

This documentation is specific to version 9.0. You can find the most up-to-date help files for the latest version at Current Online Laserfiche Product Help Files.

For further help or feedback, please see the Laserfiche Support Site.


© 2013 Laserfiche